|
Pulled Up Console
|
| jsb91010 |
Posted on 07/28/09 - 3:34 PM
|
Member
Posts: 128
Comments:
0
Joined: 05/01/08
|
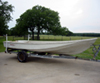
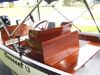
ok guys...My boat takes a beating since i use it alot and the center console has pulled out on one side. It's a 13' whaler so the deck is thin and they don't hold very well. My question is...what are the downsides of fiberglassing the console permenately? I'm happy with where it's at, don't think i would need to move it. I have a feeling if i screw it back in, it will just pull out again. This didn't even last 1 year before pulling out
http://i136.photobucket.com/albums/q1...age100.jpg
|
| |
|
|
| Blue_Northern |
Posted on 07/28/09 - 4:19 PM
|
Member
Personal Page
Project Albums
Posts: 532
Comments:
5
Joined: 09/04/07
|
The problem is not that the floor is thin but that there is no wood in the area you are screwing down the console. Take a look at the 13 footer Wood Locating Diagrams. What you really need is something under the deck like a molly bolt that will flair. The issue is then going to be rust.
If you glass some structure like wood under the deck you will have the issue of repairing the non-skid. I think I would glass 2 strips of a good material like Coosa Composite to the hull for something to screw into. This way if you want to pull your console later it will come out easier.
Rob
1973 Outrage/Lo-Pro Conversion |
| |
|
|
| uncledeck |
Posted on 07/28/09 - 4:47 PM
|
Member
Posts: 8
Comments:
0
Joined: 04/07/09
|
My only issue with glassing it down would be if you needed to work on something on the underside of the console sometimes it is easier to pop it loose and tilt the console forward than it is to lay on your back and work over your head.
Blue is correct, there is not any wood in this area and the glass in the floor is less than 1/8" thick. I don't know of any molly-bolt type fastners in Stainless, but if you could find some that might work.
A temp fix might be to go one size larger in diameter on your screws, clean the deck and bottom of the console really well and set the console down with 4200 sealant under the full footprint of the console. It might not last forever, but if you needed to get it up for repair work I think you could.
A more permanent fix would be to glue some wood into this area to take the screws. I think you would want to use at least 3/4" diameter dowel and maybe thricker. Use a piece of coat hanger and push it into some of the existing holes to confimr you have at least 2" of clearance under the deck before you start. On the center of the existing holes in the floor drill a 3/4" dia by about 1-2 inch deep holes through the deck and into the foam. Epoxy glue sections of dowel so they are flush with the surface of the deck. Locally sand the deck around each hole so you have a flat surface to lay in a ply or two of fiberglass cloth so it extends about 1" inch beyond each hole. Do the resin and rub out thing with the glass cloth. Sand things smooth after cure and drill pilot holes through the glass and into the dowels using the console as a pattern. Install the screws with 4200 and you should be good.
|
| |
|
|
| Phil T |
Posted on 07/28/09 - 5:54 PM
|

Administrator
Personal Page
Personal Album
Project Albums
Posts: 6994
Comments:
6
Joined: 03/26/05
|
I think you should use plugs rather than dowels so the screw will be going through the grain, rather than with the grain.
Another alternative is the "hockey puck" method. Using an allen wrench (short side in a drill) make a cavity in the foam, suck out the bits and fill with gorilla glue. Let set and then tap. Do this for each screw location.
|
| |
|
|
| MW |
Posted on 07/29/09 - 3:36 AM
|
Member
Personal Page
Posts: 1827
Comments:
10
Joined: 01/08/06
|
I'd drill the holes a bit larger, insert dowel's coated with "Marine tex", let dry, then pilot drill them, I did that 2-summer's ago for my side rail's, still "Rock Solid", and we ride "Rough" (lot's of air).
Matt |
| |
|
|
| Binkie |
Posted on 07/29/09 - 10:42 AM
|
Member
Personal Page
Posts: 2012
Comments:
0
Joined: 12/19/05
|
Phil`s method using Gorilla Glue works really well. Make sure you put tape around the hole and over the hole after you pour in the glue as it expands and will make a mess if it gets on your deck. Also a weight over the hole with glue in it will make sure the glue expands downward and fills the cavity. It is strong stuff, and much more than just glue.
Rich |
| |
|
|
| Turpin |
Posted on 07/29/09 - 10:53 AM
|

Member
Personal Page
Project Albums
Posts: 434
Comments:
20
Joined: 07/04/08
|
I'd first try Phil or MW's idea. When I relocated my console, I glassed in a piece of treated 2x4 under the floor. It ain't gonna hold unless the screws have something to hold. As uncledeck stated it would be probably be in your best interest down the road if the console was not glass into the floor.
On the Gorilla glue idea, if you choose that method. Remember tape well outside your hole as that stuff will expand and stick to anything.
1963 13' Sport 50hp Evinrude
Maintaining a level of sanity that is socially acceptable |
| |
|
|
| MushCreek |
Posted on 07/29/09 - 1:43 PM
|
Member
Personal Page
Posts: 24
Comments:
0
Joined: 06/08/09
|
We$t Marine has SS toggle bolts- I saw them this weekend while trying to figure out what kind of currency they use for pricing.....
When I was into windsurfing, I used to buy special inserts for mounting the foot straps to the deck of a windsurfer. They are a plastic cylinder about 1-1/4" in diameter, that you epoxy into place (after drilling a big hole). I never had one pull out, under considerable force.
|
| |
|
|
| jsb91010 |
Posted on 07/30/09 - 1:38 PM
|
Member
Posts: 128
Comments:
0
Joined: 05/01/08
|
Phil...your idea sounds to me like the easiest and best way. I don't want to do anything too serious now because I bet the other side pulls up soon then i can do something serious on both sides. So do i need to make the holes a little bigger before digging out the foam? Then i just dig out foam, clean it out....pour in gorilla glue with tape over it and a weight...Once that dries i can just set console back down and drill into the dried glue...right? Am i on the right track?
|
| |
|
|
| Phil T |
Posted on 07/30/09 - 3:22 PM
|
Administrator
Personal Page
Personal Album
Project Albums
Posts: 6994
Comments:
6
Joined: 03/26/05
|
I must state this is not "my" idea, rather learned from several veteran whaler owners who have used this technique with good success.
You can make the hole slightly larger. The key is the allen wrench and making a cavity.
Gorilla glue expands ALOT so don't fill the hole to the very top. (Squirt out a bit on some cardboard and let it set so you can see by how much it expands). You want the glue to ooze out a bit. If you tape off the area really wide, it will help keep it from getting on the deck. When the glue expands, it will bond to the foam and fiberglass deck so you will have more area for the screw to attach to.
Aside - 80% of my "advice" is from all the reading and talking to whaler owners who have done work on their boats.
Edited by Phil T on 07/30/09 - 3:22 PM |
| |
|
|
| jsb91010 |
Posted on 07/30/09 - 3:40 PM
|
Member
Posts: 128
Comments:
0
Joined: 05/01/08
|
ahhhh it don't matter who's idea it is in the long run  ...after i get done ill tell someone and let them think it's "my" idea ...after i get done ill tell someone and let them think it's "my" idea  ...I did one test hole now to see how it turns out...hope for the best!!! ...I did one test hole now to see how it turns out...hope for the best!!!
|
| |
|
|
| jsb91010 |
Posted on 07/31/09 - 12:51 PM
|
Member
Posts: 128
Comments:
0
Joined: 05/01/08
|
well...i tried to use the gorilla glue but that stuff doesn't even get hard????? After 6 hours it was still a foam...almost like the whaler foam lol...What happened? I could use some of the marine tex i have, but it's hard to get it runny so it will "run" in the holes....it's too putty like for me. Any ideas welcome. Thanks guys
http://i136.photobucket.com/albums/q1...e100-1.jpg
|
| |
|
|
| Phil T |
Posted on 07/31/09 - 1:43 PM
|
Administrator
Personal Page
Personal Album
Project Albums
Posts: 6994
Comments:
6
Joined: 03/26/05
|
It takes 6-12 hrs to cure, depending on conditions. What is the ambient temperature and relative humidity there?
|
| |
|
|
| jsb91010 |
Posted on 07/31/09 - 3:15 PM
|
Member
Posts: 128
Comments:
0
Joined: 05/01/08
|
temps are above 100*, and humidity pretty high about 60% lately maybe higher, it's humid!
|
| |
|
|
| Turpin |
Posted on 08/01/09 - 8:21 AM
|
Member
Personal Page
Project Albums
Posts: 434
Comments:
20
Joined: 07/04/08
|
It will get hard as a rock, but it does take time to cure. It will normally set-up in 4-6 hours but will not get solid before at least 10 to 12 hours.
1963 13' Sport 50hp Evinrude
Maintaining a level of sanity that is socially acceptable |
| |
|


