Before Posting, Please Read Our Posting Guidelines Below.
1. Use the full 4 digit year for everything you are asking your question about. Example: 1962, 1988, 2000, 2011 2. Include the correct name of your Whaler model. Example: Montauk 17, Montauk 170, Outrage 26, Outrage 260 3. Include the length when necessary. Example: 16, 17, 18, 20, 22 4. Do not post your email address anywhere on this site as it is already in your user profile.
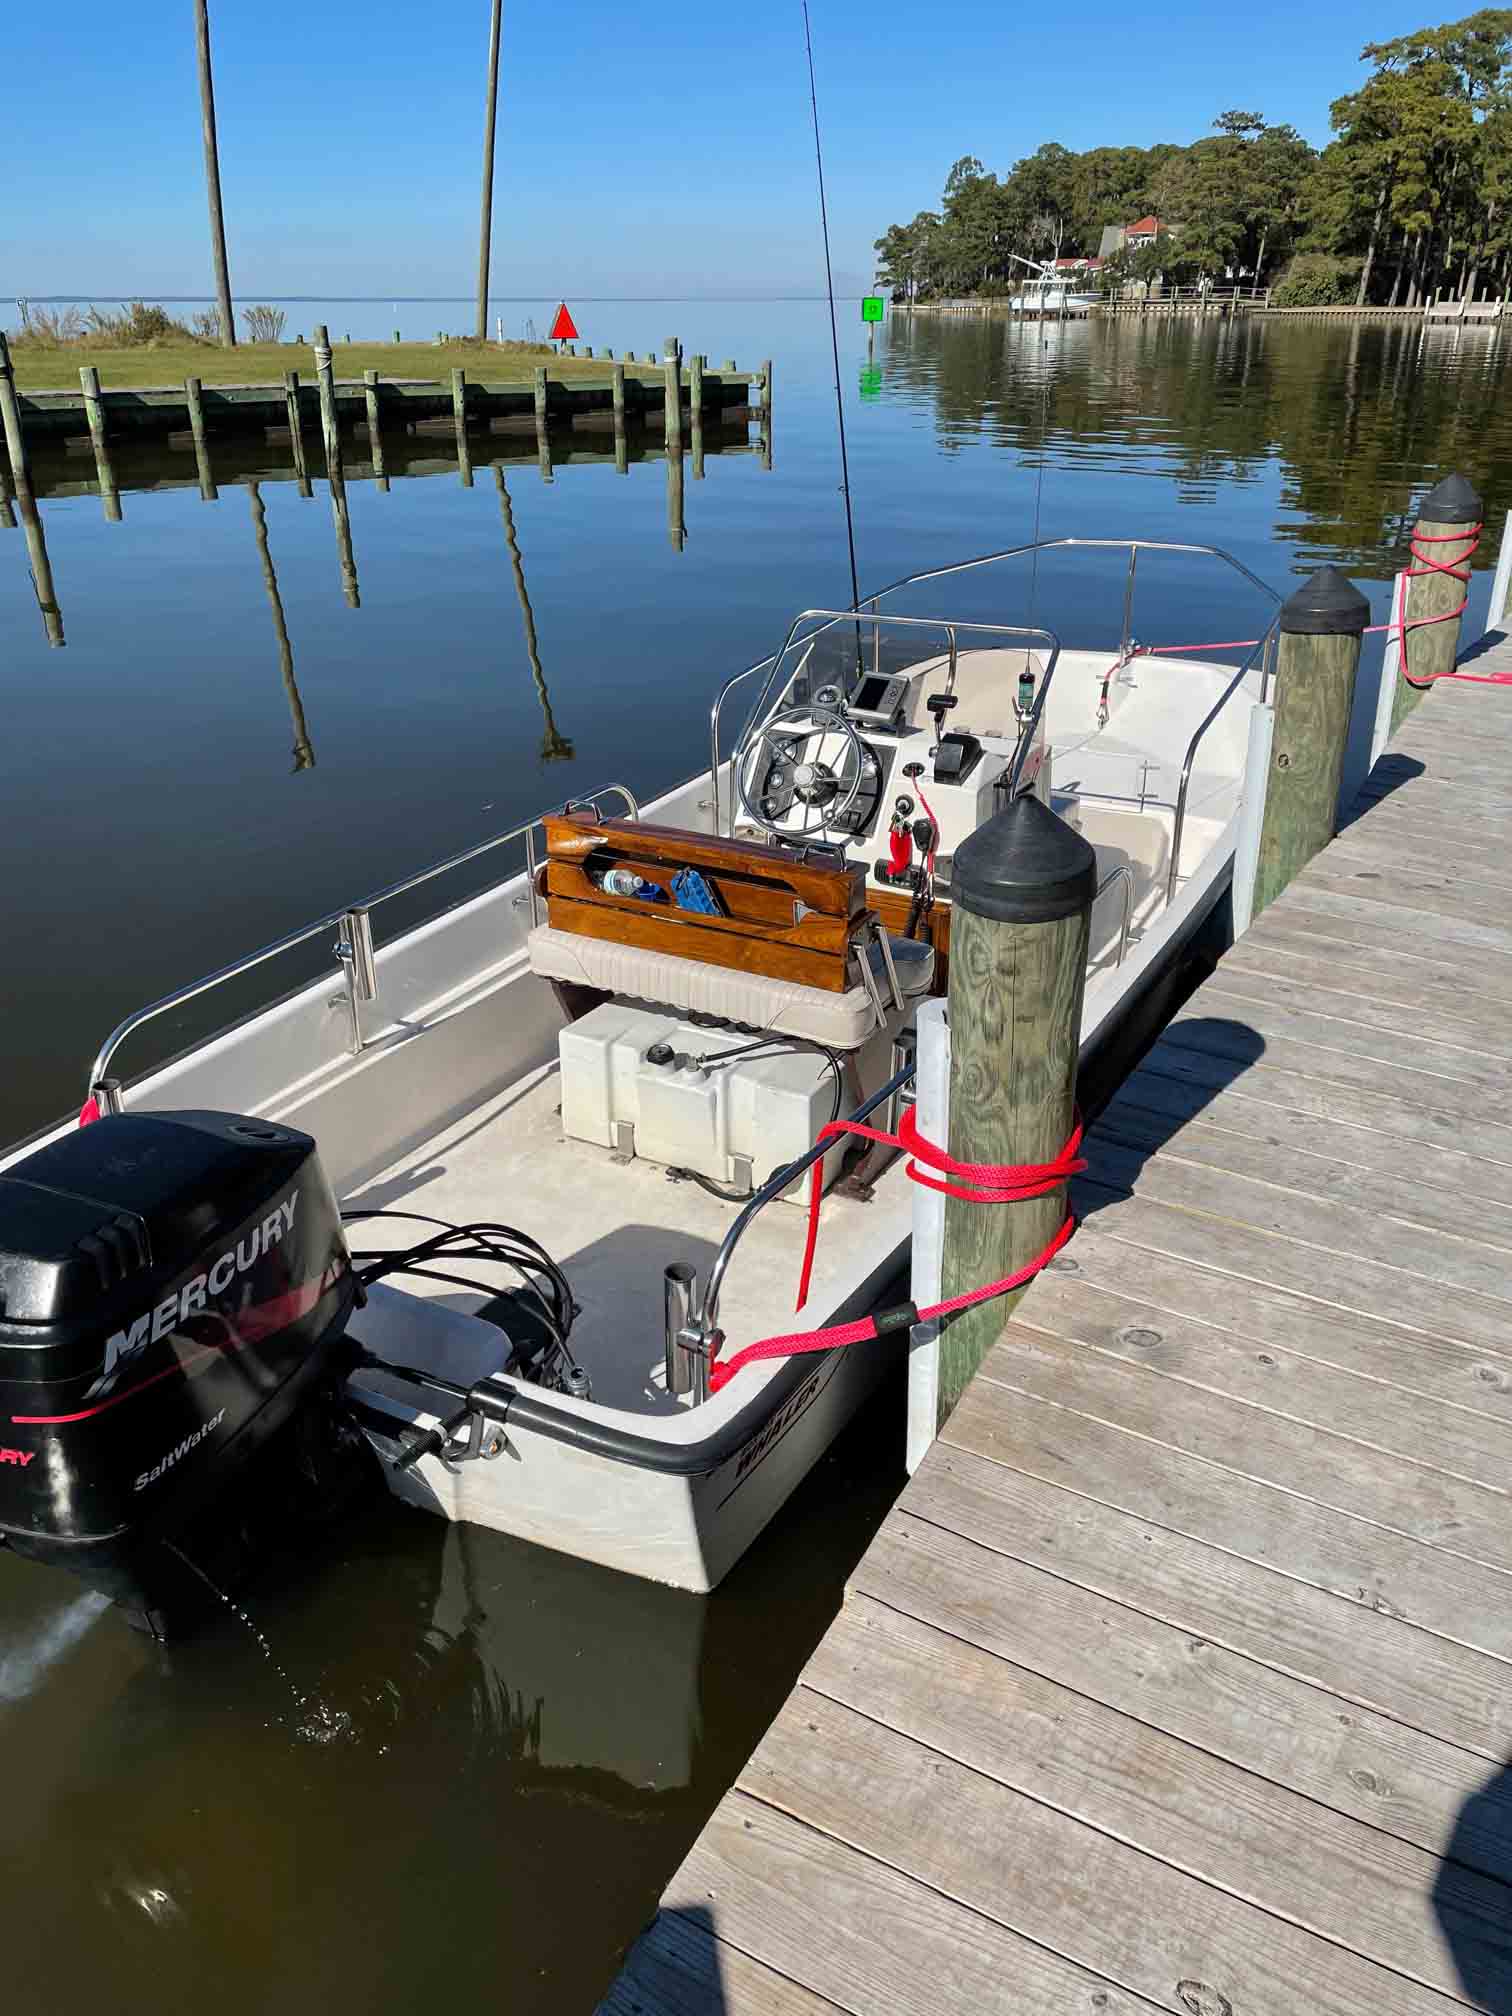
Last week, on our last day on the water this year, we had a good day to test our 2000 Montauk 17 for its overall performance. I purchased the boat in June, 2021. The boat has its original 2000 Mercury 90 HP 2 stroke.
I have been reading all summer on this forum threads regarding boat performance for various model Whalers and it seemed to me that my boat could be doing better in the top speed category. I have no trouble getting on plane even with four people on-board but top speed at WOT has been somewhat lower than expected based on what I have read here on Whaler Central. Handling has been good although I have not been impressed at very slow speeds around the ramps I use. Its probably me as I previously owned a 19 foot bass boat with a Jet outboard for 15 years and my tendency is to over-steer at slow speed.
Here are some numbers from last week's run. The weather was perfect, sunny and about 68 degrees with about a 5 knot wind on the Currituck Sound, NC, near the Wright Bridge.
My Montauk 17 had on-board a full tank of gas (@22 gallons) two adults (my wife and I and all I will say is that we weigh about 3 times the weight of the gas.) and the usual gear (anchor, lines, two batteries, some fishing gear).
WOT at 5200 RPM 34 MPH (GPS Speed) - average top speed in both directions up and down wind.
Cruised at 4300 RPM 26 MPH with the motor all the way in. Trimmed out the motor about 5" and increased mph to 29 MPH.
Fuel used for the afternoon - 7.1 gallons (pure gas) GPS Odometer showed 23.3 miles traveled for overall 3.28 miles per gallon of fuel.
Our Whaler is bottom painted with the paint probably needing refreshment. I do not know when it was last painted and the finish is dull and comes off when I touch the paint with a wet finger. I trailer the boat exclusively and don't intend to moor the boat in a slip in the future for any length of time.
Outboard is mounted in the top hole and, as I understand from reading here on WC, I probably should move the motor up two holes.
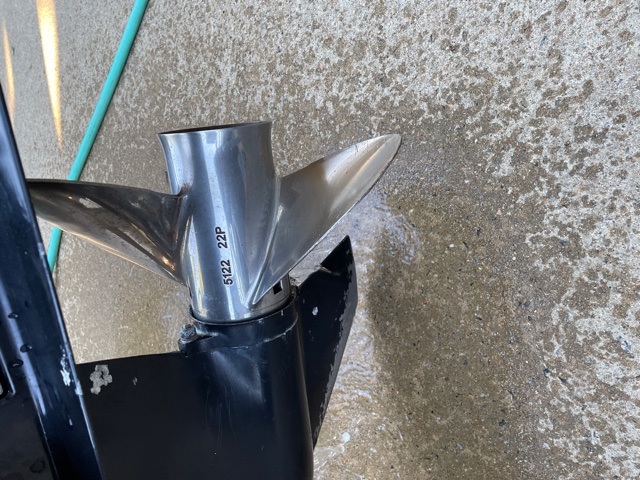
The propeller on the Merc 90 is a stainless steel 3 blade and is marked 5122 22P. Most likely this is a Quicksilver 13.5" Diameter 22" Pitch prop, based on the research I have done online. I cannot find any other markings on the prop.
Boat floats at the dock right at the water/bottom paint line so I do not believe that its heavy from water in the foam. Hull seems solid with no apparent damage.
I would be interested in opinions about all of the above and whether there are recommendations anyone may have so I can improve performance. I have the winter months to work on that.
Considering the load on the boat that day are my numbers reasonable? I plan to move the motor up this winter so its mounted in the third hole. Not sure what to do with the bottom paint since removing it may not be worth the cost (I am not really able to do it myself because I don't have a garage to do that and feel too old to get on my back on the floor and do that work). I have stripped and refinished many pieces of furniture over the years but boat bottom paint is a whole different animal.
Before making a major investment in a prop ($3-800), raise the engine so that the top bolt is in the 3rd hole down from the top.
If the lower bolts are in the blind hole of the bracket, they will need to be filling in and new lower holes drilled. There is a template available.
I would run the boat with just you and a tank of gas and report back WOT rpm and speed.
You still have time this year.
I will make a forecast. Your prop is sized for a very light load. Here are two props that are recommended by owners who have the Mercury 90 2-stroke on a classic Montauk:
13-1/4" x 20" Laser II / Lightspeed
13-1/4" x 19" Turbo 1 / Stiletto Advantage
Target speed with either of these props, running light is 43mph.
Edited by Phil T on 11/13/21 - 1:57 PM
1992 Outrage 17 I
2019 E-TEC 90, Viper 17 2+
2018 Load Rite Elite 18280096VT
Thanks Phil for your advice. I agree that an incremental approach is the best.
I am in northern Virginia now, where I live, so if the weather cooperates I may find a day to get to Lake Anna possibly or put in at Occoquan but the wind on the Potomac at this time of year is usually brutal and thus the water pretty rough. The problem is that I will need to have the motor raised by a service pro. I cannot do this myself and everyone is busy now winterizing boats and motors. I will see how soon I can get this done.
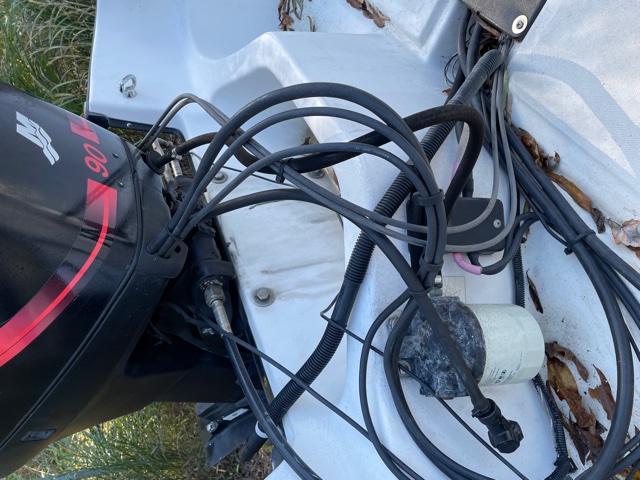
I do not know what you mean by "blind hole", sorry. Is that the lower hole in the transom ? Both mounting bolts on the motor are through the hull. Here is a photo of the mounting bolts from the outside. I will also upload one showing the well where you will see the bottom mounting bolt.
The lack of lower bolts coming out of the slots indicates the lower bolts are using the blind (threaded) holes in the motor bracket.
Installers never considered the need to raise an engine.
You will want to remove the engine, fill the existing holes with wood plugs covered in epoxy. Finish off the inside and outside with Locketite Marine Epoxy in white. It cures to close color match to desert tan.
In the photo there is a through bolt in the top hole at the bottom of the bracket. It’s black and hard to see in the photo. There are four empty holes below both the top and bottom through bolts. Why couldn’t the motor and bracket just be raised to the middle holes at the top and bottom of the bracket?
I have a pair of these engines on my Outrage 18, so am familiar with the engine. Mercury has NEVER manufactured an engine bracket using blind holes. That was a (terrible) OMC invention, used by them only, and maybe copied by Yamaha? I can see the lower bolts in your installation.
The propeller is the earlier version of a Mercury Laser II without the changeable vent plugs, a Quicksilver "Lightspeed". They are good, fast props. Because of the large stamped numbers, yours is less than ten years old. Although this prop can work on your rig, a 20" pitch version could be more appropriate.
Your problem is that your speed vs RPM numbers do not calculate, as long as your engine gears (2.33) are original and the propeller hub is not slipping. With a given propeller, RPM and speed tend to be a fairly constant relationship. The 5200 RPM max sounds about right with that prop, but the boat should be doing about 42-44 mph. So your GPS reading could be wrong, or your RPM is reading wrong, or the prop is slipping badly. That is where I would begin. A 20" Laser II prop should give your 5500 RPM and the same 42-44 MPH. Because of bottom paint, yours may be closer to 42. The Merc 90 you have is a strong engine, running correctly, close to 100HP at the prop.
The engine should definitely be raised up to the 3rd set of mounting holes. With ANY engine, Boston Whaler recommends on the Montauk for the engine to be mounted in the second bracket hole. In addition, your engine has a longer (taller) than normal mid section length, so it should be up even higher. And the Lightspeed/Laser II is
a "surfacing" prop, requiring a higher engine mounting. If speed is your main objective, you could even install the engine in the 4th set of holes, but for all around use I would stay with the 3rd. Incidentally, your bottom bolts are installed in the wrong direction. Per Mercury's instructions, the lower bolts should have the heads on the outside, indicating your engine installation was not done by the factory, but probably by a Dealership.
I would also get rid of that badly corroded water separating fuel filter. They are not needed in a boat with on-deck fuel tank.
So what I would do is to first get the engine raised up, and check the propeller hub, particularly the black drive sleeve. If good, the engine hub assembly should easily go in and out. Look for 5000 RPM and 42 MPH. If not, check RPM and GPS for accuracy. i am suspecting your tach reading. But if so, than the engine is not putting out the proper power and may need work. Once you get everything running correctly, then change to a lower pitch prop. I think the factory supplied a 21" aluminum prop on your rig, and they are only about $100, but not quite as fast as the Laser II. You should be able to find a good used Laser II 20" on Ebay.
Good news is you can raise the engine DIY using the trailer. All you need is a wrench, maybe a rubber mallet and some marine sealant (not adhesive) and a second set of hands to operate the tongue jack.
The GPS speed and my speed gauge match when underway so I don’t think the speed on the gps is wrong. Although, on my previous boat I didn’t trust the speedo at all and always used gps for speed. Not sure about the tach.
So do you agree that the motor could be raised without new holes? (Thanks for the information and the bolt direction).
When I arrange to have the motor raised I can ask the technician to check the motor out to assure its producing expected HP.
Is there a way for me to check the prop slippage myself?
Good news is you can raise the engine DIY using the trailer. All you need is a wrench, maybe a rubber mallet and some marine sealant (not adhesive) and a second set of hands to operate the tongue jack.
Great! I have all those tools. I also have 3M marine adhesive and a partial tube of clear sealant, Lifeseal that I use for deck screws, etc.. You will have to explain to me using the "tongue jack". I can get a second pair of hands to help. Are you suggesting trimming in the motor to rest on the ground and then using the jack on the trailer to lower the transom into position to re-bolt the motor?
Art
Edited by alibertucci on 11/14/21 - 11:50 AM
2000 Montauk 17
Smooth Whalin’
Raising the motor is a DIY if the lower bolts are in the slots and the boat is on a trailer and you can have someone help you at one stage.
A second set of hands is helpful to monitor/hold engine steady or operate the tongue jack. If not available, make sure lower nuts are only loosened enough for the bracket to slide.
Steps:
Park trailer on firm and level ground.
Block front and back of both wheels.
Place a block of wood on the ground below the skeg for protection
Lower the tongue with the jack so you can position engine vertically.
Center engine with steering wheel and tie off
Remove any excess sealant around the bolts on the outside and inside of the transom.
Slightly loosen (do not remove) the nuts on the lower bolts. (so the engine can slide when raised)
Remove the nuts on the upper bolts.
Gently tap the upper bolt heads to break the sealant hold and remove.
Raise the tongue with the jack so the transom holes align with the desired holes.
Insert marine sealant (NOT adhesive) into the upper hole from the inside of the boat and from the outside.
Insert upper bolts and washers and tighten nuts. Wipe off excess sealant.
Reapply sealant to the outside of the lower bolt shaft in its new position.
Thanks Phil for the detailed step by step procedure. I plan to give this a try as soon as I have help to do it.
There is one step that concerns me slightly.
Slightly loosen (do not remove) the nuts on the lower bolts. (so the engine can slide when raised)
My motor bracket has five holes for the lower bolts and those bolts are through the transom. So, I would have to also remove the lower bolts to raise the motor. I know my photo is dark there but the lower bolts are not in slots that would allow raising the motor without removing those lower bolts. This introduces the risk that the person holding the motor on the skeg might fail to maintain its balance.
I would be much more comfortable if the lower bolts were in a bracket slot.
Edited by alibertucci on 11/15/21 - 6:23 AM
2000 Montauk 17
Smooth Whalin’
I would also get rid of that badly corroded water separating fuel filter. They are not needed in a boat with on-deck fuel tank.
I was wondering if Finnegan or anyone could elaborate on this point? I was going to replace the water separator with a new one so I am wondering why it is not needed? The filter was replaced this summer in July.
Larry (Finnegan) has long recommended removing these filters for boats that have above deck tanks as unnecessary. The above deck tank has a vent that can be closed.
I agree with him.
Most fuel will be used up within the season. If not, the fuel can be transfered to small engines or your automoble, tractor, sled etc.
Thanks Phil, I agree with your advice on this. 1500 lb. lift rental is $40/day here. I will work on this and when I have a chance to raise the motor and do another trial I will check back with the numbers.
The purpose of a water separating filter is to get rid of water that might accumulate in the fuel tank. Water condenses and drips into a fuel tank when there is a temperature differential between cold tank walls and the surrounding warm ambient air. This is usually a winter condition when a "winter thaw" occurs.
The temperature of on deck tanks closely follows the surrounding air temperature, so no differential condensation can occur. Hence on deck tanks do not condense water out of the air and do not need the filter.
Conversely, built in tanks, and particularly those in foam insulated Whaler hulls, do not warm up quickly as the ambient surrounding air, and the moisture laden warming air enters the tank though the fixed 5/8" vent hose. with water likely condensing on the tank ceiling and walls, and dripping into the gasoline. Hence the need for a water separating filter. This is also the reason they tell you to fully fill your tank for the winter storage, so no tank "ceiling" is exposed, and hence no possible condensation can occur.
As we all know, Whaler has been only selling new boats fully rigged with Mercury outboards. Note that the smaller boats, that require on-deck tanks, are not fitted at the factory with water separating filters. Also note that all Whalers with built-in tanks are always (correctly) fitted with the filters. If you have on deck tanks, and feel you need a dirt filter, you can install a $5 in-hose plastic filter.
On the performance issues, it looks like it will be March before I get the motor raised. With Thanksgiving here, family obligations through the holidays and winter I don't see getting that done until then. Time to just winterize and button everything up until then.
I have a 1990 Montauk 17 with the original 1990 Mercury 90 HP (2-stroke) engine and a 13” x 19” stainless Mercury propeller, a setup much like yours, although you have a fancier polished propeller with vent holes. I have used my boat in lakes, bays, and the near offshore Gulf of Mexico for over 30 years. In preparation for the installation of a hydraulic jack plate, I recently did some performance testing on my boat, and I thought you might like to review the results:
Location: Lewis Smith Lake, AL (MSL 500 feet). Wind S 5 mph, temperature 78F.
One person aboard, 12 gallons fuel in port Mirax tank, one battery at stern (starboard).
All values average of upwind and downwind measurements.
- Time to plane (from idle speed until bow begins to descend at full throttle): 2.0 seconds with trim fully down/in.; 4.0 seconds with trim in cruise position.
- Speed @4000 rpm (cruise): 28.5 mph (statute) (I usually get 25-26 mph with three people, 24 gallons of fuel, two stern batteries, and a full 72 quart ice chest ahead of the center console).
-WOT 5,400 rpm, with speed 39 mph (cruise trim); mild chine walking encountered.
As you can see, my performance is better than yours despite my prop having 3” less pitch and a more basic propeller, although I admit that your boat was more heavily loaded. It is indeed likely that your engine is mounted too low. However, before you pull off your motor (if you haven’t already), I would like to suggest the following:
1. Make sure your motor is tuned up, your tachometer is accurate, your trim tab is set appropriately, your bottom is smooth, and your propeller is in good shape, otherwise the advice below and in the other replies will be of no value.
2. Check the position of your motor’s ventilation plate in relation to your keel. (If you are unsure how to do this, I suggest you read this article:
https://www.boats.com/how-to/the-outboard-expert-boost-speed-with-outboard-engine-height-adjustments/
You may encounter suggestions on this and other discussion boards to mount your engine “2 or 3 holes up”, but this advice assumes that you have an engine of standard length, a standard transom height, and bolt holes in the transom that are at the standard height (1 and 7/8 to 2 inches from the top bolt hole centerline to the top of the transom). Your bolts look like they may be a little higher up than that, and your dealer may have done that on purpose to ensure that the lower bolts clear the bottom of the splashwell. (If your bolt holes are closer than 1 and 3/4 inches from the top of the transom, I suggest you consider installing a transom reinforcing plate for the top bolts). With respect to the position of the motor, what really matters is how deep the lower unit is in the water while the boat is underway. If the lower unit is deep, the increased drag will slow down the boat and make steering a bit harder while making the propeller less likely to ventilate in sharp turns or in rough water. If the motor is high, you’ll go faster and the unit will be easier to turn, but you will encounter more prop ventilation issues. If it’s really high, you could even reduce the amount of water entering the intake holes below the ventilation plate. This is why some high-performance boats have water pressure gauges and low water-intake holes.
My Mercury owner’s manual says that the ventilation plate should be positioned from one inch below to even with the keel, preferably even, and many boats are sold this way. However, my ventilation plate is 1.25” ABOVE the keel; I think the dealer mounted it that way because one of the splashwell drain holes was installed too close to the midline, and this prevented the dealer from installing the motor any lower. My engine is mounted “2 holes up”, and I’m guessing by the position of your bracket, your ventilation plate is about even with the keel. You will find that most people on this and other discussion boards recommend the ventilation plate be 1.5” above the keel, but given my own experience and the possibility that you might encounter rough water in Currituck Sound, I think if your ventilation plate is 1.25” or even 1” above the keel, your performance should be satisfactory. Fine tuning the height isn’t really an option with your setup, as moving the engine up or down by one bolt hole changes the height by 0.75”, and pulling the engine to change the height is a huge hassle, which is one reason why people install jack plates. I’m satisfied with my boat’s performance (although I occasionally experience ventilation at the top of a large swell and in sharp turns), and I don’t expect much improvement with a jack plate, but I do look forward to lowering the motor a bit when I’m in rough seas and raising it to the max when I’m idling in shallow water as I approach Timbalier Island.
3. Once your motor/ventilation plate is where you want it, you should repeat your performance runs under conditions like those you had before your modification. I suggest you trim and check your boat speed at your “cruise rpm”, the motor speed which gives the maximum fuel efficiency. If you have a fuel flow meter and a GPS unit, you can calculate this rpm (and that is the best method), or perhaps you can find the info for your boat on the Internet; otherwise, you’ll have to default to the engine manufacturer’s number (which is about 4,000-4,200 rpm for my motor). Once you have trimmed your motor to get the maximum boat speed at that setting, I suggest you leave the trim set that way to get your time to plane and WOT speed. (Strictly speaking, the trim should be changed whenever you encounter a different boat speed, boat weight or weight distribution, or water condition, but I find this a hassle and rarely do it. When I leave the dock, I trim the motor all the way down/in, get on plane, set the trim at cruise rpm, and leave it there for the rest of the day.) You should also determine your motor's wide-open throttle (WOT) rpm with the appropriate trim. In general, after your boat is optimally set up, your WOT rpm should be close to the upper limit of the range specified by the manufacturer, maybe within 100-200 rpm. My motor's recommended WOT range is 5,000 to 5,500 rpm, and I think you will find that most people set up their boats to get a WOT just at or below the top of the recommended range. If you are still not there after repositioning your motor, only then should you consider swapping out your prop to achieve your performance goals.